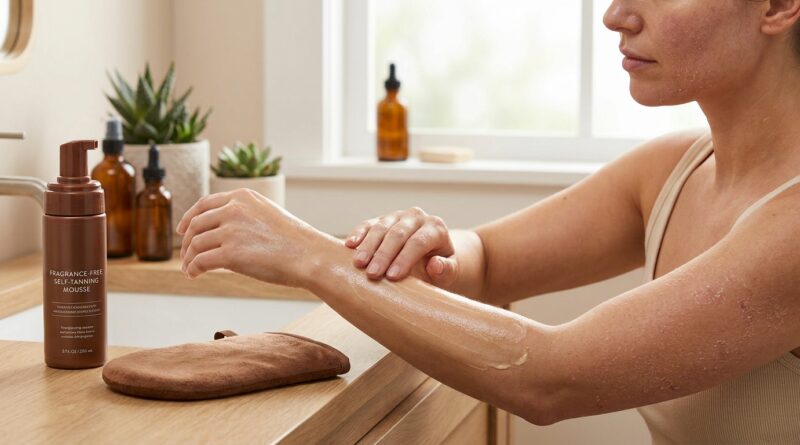
New ‘Barrier-First Tan’ Rule: How To Prep Your Skin So Self-Tanner Doesn’t Trash Your Moisture Barrier
You can buy the best self-tanner on the shelf and still end up with tiger stripes, itchy patches, and dark knees that look two shades off. That is the frustrating part no one talks about enough. Self-tanner reacts with the very top layer of your skin, so if that layer is dry, irritated, flaky, or overworked from acids and retinoids, your glow can go weird fast. The new barrier-first tan rule is simple. Prep your skin like skin care comes first, color second. If your moisture barrier is calm and hydrated, self-tanner usually applies more evenly, fades better, and feels a lot less irritating. If your skin is stinging, peeling, or rough, that is your cue to pause and fix the barrier before you tan. A better bronze often starts with doing less, not more.
⚡ In a Hurry? Key Takeaways
- Prep for self-tanner safely by making sure your skin barrier is smooth, hydrated, and not actively irritated before application.
- Stop harsh exfoliants, retinoids, and strong acids for a short window before tanning, then moisturize dry zones like elbows, knees, hands, and ankles.
- If your skin is burning, peeling, or rashy, skip tanning until it settles. A damaged barrier almost always means patchier color and a higher chance of irritation.
Why the “barrier-first” rule matters
Self-tanner does not sink deep into your skin. It mostly works on the outermost layer, which is exactly why skin condition matters so much. When that top layer is healthy, color tends to develop more evenly. When it is cracked, flaky, or inflamed, the tanner can grab in all the wrong places.
That is why learning how to prep skin for self tanner safely is less about chasing a darker result and more about creating a stable surface. Think of it like painting a wall. Smooth wall, smooth finish. Chipped wall, messy finish.
First, check your skin before you tan
Before you exfoliate or apply anything, do a quick scan.
Green light signs
Your skin feels comfortable. No stinging after cleanser. No obvious flakes. No raw patches. No active rash. Mild dryness is usually manageable with good prep.
Yellow light signs
Your skin feels tight, looks a bit dull, or has small dry spots on elbows, knees, hands, or ankles. You can often still tan, but prep needs to be gentle and focused.
Red light signs
Burning, itching, peeling, over-exfoliated skin, recent wax irritation, sunburn, or a rash. This is not the time to self-tan. Let your barrier recover first.
The 48-hour barrier-first prep plan
Step 1. Ease up on strong actives
If you use exfoliating acids, scrubs, retinoids, benzoyl peroxide, or other strong treatments, it is smart to pause them before tanning, especially on the areas you plan to bronze. These can leave skin extra dry or uneven, which makes color cling and fade in strange ways.
If you are trying to keep your glow while using stronger skin care, this guide on New ‘Retinol-Safe Tan’ Rule: How To Keep Your Self-Tanner Glowing While You Use Strong Actives is worth reading. It helps connect the dots between active skin care and patchy tan results.
Step 2. Use gentle exfoliation, not a skin assault
Yes, exfoliation can help. No, you do not need to scrub yourself like a kitchen pan. The goal is to remove loose surface flakes, not strip your skin raw.
Use a soft washcloth, a gentle exfoliating mitt with light pressure, or a mild body exfoliant. Focus on rough areas. Avoid going hard on already sensitive spots. Exfoliating too aggressively can create the exact patchiness you were trying to prevent.
Step 3. Moisturize to repair, not just to soften
This is the part people rush. Don’t. A good barrier-supporting moisturizer helps fill in dryness and calm irritation before tanner goes on top.
Look for creams or lotions with ingredients like glycerin, ceramides, hyaluronic acid, squalane, colloidal oatmeal, or petrolatum. Fancy is optional. Effective is what matters.
If your skin is very dry, moisturize consistently for a day or two before tanning instead of doing one last-minute slather and hoping for the best.
Step 4. Skip shaving or waxing too close to application if you are sensitive
Freshly shaved or waxed skin can be more reactive. Shaving can also leave skin temporarily irritated, especially if your razor is dull or your skin is already dry. If you know your skin gets angry, give it a little breathing room before tanning.
What to do on tanning day
Take a lukewarm shower
Hot water can make dryness worse. A quick lukewarm shower is enough to freshen skin and remove deodorant, oils, or leftover product that might block even application.
Dry fully before applying
Damp skin can make self-tanner grab unevenly. Pay extra attention to creases like behind the knees, underarms, and around the ankles.
Use the “moisturizer map”
Apply a thin layer of moisturizer only to the driest, grabbiest zones. Usually that means elbows, knees, ankles, feet, hands, and sometimes wrists. This creates a light buffer so those spots do not go too dark.
Do not coat your whole body in thick lotion right before tanning unless the product directions specifically say you can. Too much slip can dilute the tanner and cause streaking.
Patch test if your skin is reactive
If you have sensitive skin or a history of contact irritation, test the self-tanner on a small area first. Wait to see how your skin responds. A glow is not worth a rash.
Application habits that protect the barrier
Use less product than you think on dry areas
The darkest mistakes usually happen on joints and extremities. Use leftover product from your mitt for hands, feet, elbows, knees, and ankles rather than pumping out a full fresh amount.
Do not keep layering to “fix” a bad texture day
If your skin feels rough, adding more tanner will not smooth it out. It will usually make the roughness look darker. Better to do one light layer, then correct later once your skin is settled.
Wash your hands carefully
Even if you use a mitt, wash palms, cuticles, and between fingers after applying. This prevents staining and helps the result look more natural.
Aftercare matters just as much as prep
Moisturize daily
This is the secret to making a self-tan fade nicely instead of breaking apart in spots. Hydrated skin sheds more evenly. Dry skin flakes off in tiny random islands, which is why old tanner starts looking speckled.
Be careful when restarting strong actives
If you jump straight back into a strong acid body lotion or retinoid routine, your tan may fade faster or turn patchy. Ease back in, especially if you noticed dryness before.
Keep showers short and not too hot
Long hot showers, harsh soaps, and rough towel drying can all wear down both your skin barrier and your tan. Pat dry instead of rubbing hard.
Common mistakes that wreck both barrier and tan
Here are the big ones.
Over-exfoliating the night before
This can leave micro-irritation that makes tanner sting, cling, or develop unevenly.
Using active body care right before tanning
Acid lotions, retinoids, and benzoyl peroxide can create dry patches or interfere with an even finish.
Tanning over peeling skin
Peeling skin acts like a map of where color will go too dark.
Skipping moisturizer on rough zones
Elbows and knees love to hoard pigment. A little buffer goes a long way.
Applying self-tanner when your skin is already irritated
If your barrier is compromised, the result is often itchier, patchier, and shorter-lived.
How to know when to wait instead of tan
Sometimes the smartest move is to hit pause. Wait if your skin is sunburned, windburned, actively peeling, broken out with a rash, or stinging from products. Spend a few days on bland, barrier-friendly skin care instead. Gentle cleanser. Rich moisturizer. Maybe a little petrolatum on the roughest areas. Then tan once your skin feels normal again.
It is not glamorous advice, but it works.
At a Glance: Comparison
| Feature/Aspect | Details | Verdict |
|---|---|---|
| Healthy barrier before tanning | Skin is hydrated, calm, and smooth, with minimal flaking or irritation | Best setup for even color and cleaner fade |
| Tanning over dry or over-exfoliated skin | Tanner grabs onto rough patches, may sting, and fades in blotchy spots | High risk. Better to repair first |
| Using actives around tanning | Retinoids and acids can dry skin and speed uneven fading if not timed carefully | Manageable with a pause and smart scheduling |
Conclusion
The best self-tan routine is not the one with the most products. It is the one that respects your skin first. Right now, more dermatologists are reminding people that there is no safe UV tan, and self-tanners are one of the lower-risk ways to get color when used correctly. But that “used correctly” part matters. Layering self-tanner over exfoliating acids, retinoids, and a damaged skin barrier is a fast track to dryness, irritation, and blotchy color that fades badly. A barrier-focused prep routine gives you something a lot of beauty advice skips. Control. You get to protect your skin, improve your results, and still enjoy the bronzed look you wanted in the first place. Start with calm, hydrated skin, and your tan has a much better chance of looking natural instead of needy.