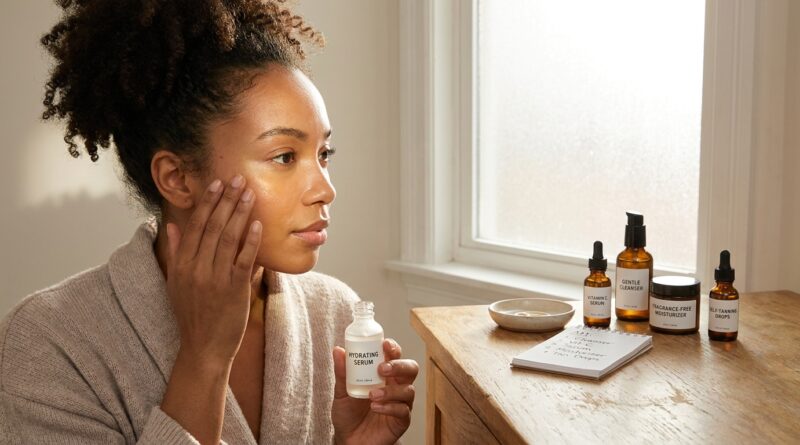
New ‘Tan-Safe Serum Sandwich’ Rule: How To Layer Vitamin C And Self-Tanner Without Burning Your Barrier
If your face has ever stung after self-tanner, or you woke up with darker patches around your mouth, nose, or eyelids, you are not imagining it. A lot of people are doing all the “right” skincare steps for glow, then ruining the finish by piling self-tanner on top of fresh vitamin C, acids, retinoids, or too many serums at once. It is frustrating, especially when the whole point was to look smoother and brighter, not irritated and blotchy. The good news is that you do not have to choose between active skincare and a believable tan. You just need better timing and a smarter order. Think of it as a tan-safe serum sandwich. Keep your treatment steps simple, buffer the risky areas, and give your skin a short recovery window before and after tanning. That one shift can mean less burning, fewer patches, and a glow that actually looks like skin.
⚡ In a Hurry? Key Takeaways
- Use active skincare and self-tanner on separate schedules. Do not put strong vitamin C, exfoliating acids, or retinoids directly under self-tanner.
- The safest routine is simple. Cleanse, use a gentle hydrating layer, protect dry zones with moisturizer, then apply self-tanner to calm, fully dry skin.
- If your skin feels hot, tight, itchy, or shiny, pause actives and tanning. Barrier damage makes color grab unevenly and raises irritation risk.
Why this keeps happening
Self-tanner itself is not usually the whole problem. The trouble starts when it lands on skin that is already overworked.
Right now, many routines include strong vitamin C, exfoliating pads, niacinamide, peptides, toner acids, and maybe a retinoid at night. Each product on its own might be fine. Stack them badly, then add DHA-based self-tanner, and the skin can react with stinging, redness, and patchy color.
DHA develops by reacting with the outer layer of your skin. If that layer is freshly exfoliated, irritated, or unevenly dry, the tan often develops unevenly too. That is why corners of the nose, the upper lip, under-eyes, and smile lines can go darker or look muddy.
The new tan-safe serum sandwich rule
Here is the easy version.
On tanning day, your skin should be calm, lightly hydrated, and not freshly stripped.
That means your “sandwich” looks like this:
Step 1: Start with a gentle cleanse
Use a basic, non-stripping cleanser. Skip exfoliating cleansers, scrub beads, acid pads, and cleansing brushes that day.
Step 2: Add one simple hydrating layer
Think hydrating serum or essence. Hyaluronic acid, glycerin, panthenol, or a very plain niacinamide serum can work if your skin already tolerates it well.
This is not the moment for a five-serum experiment.
Step 3: Buffer the grabby zones
Apply a tiny amount of plain moisturizer around the nostrils, corners of the mouth, under the eyes, brows, hairline, and any flaky spots. This stops the tan from clinging too hard where skin is thinner or drier.
Step 4: Apply self-tanner to fully dry skin
Let your hydrating step settle first. Damp skin can make product spread unpredictably. Once dry, apply your self-tanner in a thin, even layer.
Step 5: Leave strong actives out of the sandwich
No strong vitamin C. No glycolic acid. No salicylic acid if your skin gets touchy. No retinoids. No peeling pads.
Those go on a different day, not under your tan.
What to use and what to pause
Usually fine before self-tanner
These are often lower-risk if your skin already likes them:
- Gentle cleanser
- Hydrating serum
- Low-strength niacinamide
- Plain moisturizer on dry zones
Better to skip right before tanning
These are the usual troublemakers:
- Strong vitamin C, especially low-pH L-ascorbic acid formulas
- AHAs like glycolic, lactic, and mandelic acid
- BHAs if you are prone to stinging or dryness
- Retinoids and retinal serums
- Benzoyl peroxide
- Any product that tingles even a little on your skin
How to schedule vitamin C and self-tanner safely
If you are wondering about how to layer skincare and self tanner safely, timing matters more than fancy mixing.
A simple rule is this:
Use strong vitamin C in the morning on non-tanning days. Use self-tanner at night on calm-skin nights.
If you really want both in the same 24-hour window, give your skin space. For many people, that means vitamin C in the morning, then self-tanner later that night only if the skin feels normal, not tight or reactive. If your skin is sensitive, leave a full day between them.
The stronger the vitamin C, the more conservative you should be. A potent low-pH serum plus self-tanner on the same day is where many people get that hot, prickly feeling.
The first 24 hours after tanning matter more than most people think
Once you apply self-tanner, treat your skin like it needs a quiet night.
For the next 24 hours:
- Skip acid exfoliants
- Skip retinoids
- Skip harsh scrubs and cleansing tools
- Keep hydration steady
- Wear sunscreen if you are going outside
This part is easy to miss. A fake tan does not protect you from UV damage. In fact, if you have just used strong actives and then tanned over that sensitized skin, you want to be extra careful with sun exposure and free-radical stress in that first day.
If you want the easiest option, go clearer and lighter
Some formulas are simply easier to live with when your skincare routine is busy. If you hate transfer, thick guide color, or that “did I miss a spot?” panic, it is worth reading New ‘Clear-Formula Tan’ Rule: Why Invisible Self‑Tanners Are The Safest Glow Upgrade In 2026. Clear formulas can be a nice match for people trying to keep irritation low and avoid extra rubbing during application.
A simple weekly blueprint that actually works
Night before tanning
Use your last gentle exfoliation if you need one. Keep it mild. Do not combine multiple exfoliants.
Tanning day
Cleanse. Apply a light hydrating serum. Buffer dry zones with moisturizer. Apply self-tanner. Done.
Day after tanning
Focus on hydration and sunscreen. Keep your routine boring. Boring is good here.
Two days later
Bring back vitamin C or other actives slowly, based on how your skin feels.
Signs your barrier needs a break
If any of these sound familiar, pause the actives and skip self-tanner until your skin settles:
- Stinging when water hits your face
- Tightness that moisturizer does not fix
- Shiny, irritated skin that looks smooth in a bad way
- Random flaky patches
- Darker tan buildup in folds and creases
That is not your skin “purging.” It is usually your skin asking for less.
Common mistakes that cause blotches
Putting self-tanner over fresh exfoliation
This can make the tan grab fast and unevenly.
Using too much vitamin C right before tanning
Especially if it is strong and acidic. More is not better here.
Skipping moisturizer on the edges of the face
That is how you get those obvious dark rings near the nose, brows, and mouth.
Trying to fix uneven tan with more actives
This usually makes irritation worse before it makes the color better.
At a Glance: Comparison
| Feature/Aspect | Details | Verdict |
|---|---|---|
| Strong actives under self-tanner | Can increase stinging, dryness, and patchy DHA development, especially around eyes, nose, and mouth | Best avoided |
| Hydrating serum plus buffered dry zones | Helps self-tanner spread more evenly without overloading the skin | Best prep method for most people |
| Waiting 24 hours before restarting harsh actives | Gives the skin barrier time to stay calm while color develops more evenly | Smart and safest move |
Conclusion
You do not need to give up vitamin C, niacinamide, or your favorite glow serums to keep a good tan. You just need a better system. That is really the fix for how to layer skincare and self tanner safely in 2026. Ingredient stacking has moved faster than basic skin-safety habits, and that is why so many at-home sunless routines are ending in irritation, blotches, and wasted products. A clear, step-by-step layering blueprint lets you keep the parts of your routine that work, while lowering the chance of barrier damage and uneven color. Start with calm skin, keep tanning nights simple, and give strong actives a little breathing room before and after application. That is how you get a believable glow without the trial and error, and without your face paying the price for it.