New ‘Danger-Zone Tan’ Rule: How To Stop Fake Tan From Clinging To Elbows, Knuckles And Ankles In 2026
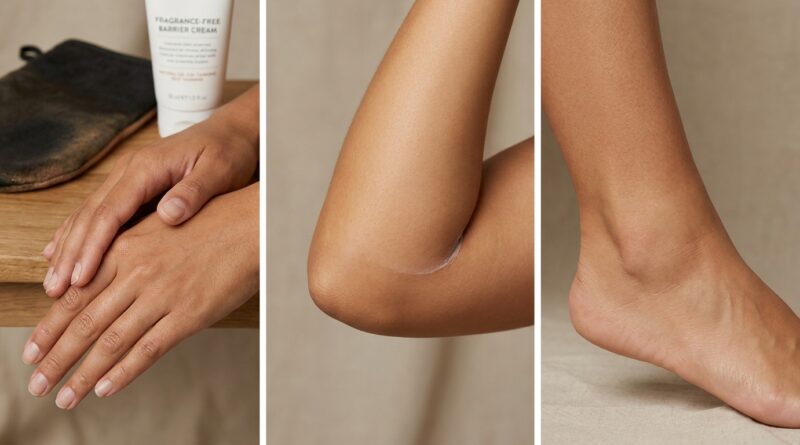
You do everything right. You exfoliate, moisturize, blend carefully, and your tan looks great. Then you catch sight of your ankles, elbows, knuckles, or the base of your palms, and suddenly the whole effect looks patchy. That is the maddening part of self-tanner. These spots seem to grab color twice as hard as everywhere else. If that sounds familiar, the good news is simple. It is not because you are bad at tanning. Dermatology experts keep pointing to the same reason. These are thicker, drier, high-friction areas, so they soak up more DHA and turn darker faster. Once you know that, the fix stops being guesswork. The new rule for 2026 is to treat these spots like danger zones before you tan, not after. A little less product, better prep, and smarter blending can make the difference between a believable glow and those muddy, orange-brown patches nobody wants.
⚡ In a Hurry? Key Takeaways
- The direct fix for how to stop fake tan clinging to elbows and ankles is to use less tanner on dry, thick-skinned areas and buffer them first with light moisturizer.
- Exfoliate the day before, moisturize elbows, knuckles, knees, ankles and palms right before tanning, then apply leftover product there last.
- This patchiness is basic skin biology, not user failure, and a better routine helps you stick with safer sunless tanning instead of UV exposure.
Why fake tan clings so badly to elbows, knuckles and ankles
Self-tanner works by reacting with the outer layer of dead skin cells. That sounds harmless enough, but it explains the whole problem.
Elbows, ankles, knuckles, knees, and the base of the palms usually have thicker, rougher, drier skin. They also deal with more rubbing from clothes, shoes, hand washing, and everyday movement. So when DHA hits those spots, it often develops darker and less evenly.
That is why one part of your body can look soft and golden while another looks muddy. It is not random. It is chemistry meeting dry skin.
The new 2026 danger-zone rule
Think of these areas as low-product zones. They should never get the same amount of self-tanner as your arms, legs, or torso.
The basic rule is this. Prep them more. Moisturize them more. Apply less product to them. Blend them last.
That one shift solves most of the problem.
What counts as a danger zone
Focus on:
- Elbows
- Knuckles
- Ankles
- Knees
- Wrists
- Base of the palms
- Between fingers and toes
- Heels and sides of feet
The prep routine that actually helps
1. Exfoliate, but not right before
Exfoliate the day before tanning, not five minutes before. If you scrub too close to application time, skin can end up irritated or uneven. That can make color catch in odd ways.
Use a gentle exfoliating mitt, soft scrub, or washcloth. Pay extra attention to ankles, heels, elbows, and knuckles.
2. Shave early if you shave
If shaving is part of your routine, do it at least several hours before tanning, ideally the day before. Freshly shaved skin can be a little sensitive, and product can settle unevenly around follicles.
3. Moisturize the danger zones right before tanning
This is the step many people skip. Put a thin layer of plain, lightweight moisturizer on elbows, knees, ankles, knuckles, wrists, heels, and the base of the palms just before you apply self-tanner.
You do not want greasy skin. You want a light buffer.
That buffer slows down how much DHA grabs onto those dry areas.
How to apply self-tanner without creating dark patches
Use your mitt in the right order
Apply self-tanner to bigger areas first. Legs, arms, torso. Then use whatever is left on the mitt for elbows, ankles, feet, hands, and knees.
Do not pump fresh product straight onto your knuckles or ankles unless the formula is extremely sheer. Leftover product is usually enough.
Bend joints while blending
Bend your elbows and knees slightly while applying. Flex your ankles. Make a loose fist when blending over knuckles. That helps the product spread across creases instead of pooling in them.
Go light on hands and feet
Hands and feet are where many tans give themselves away. Blend upward from the arm or leg using whatever remains on the mitt. Then use a clean, slightly damp cloth or a buffing brush to soften the edges around fingers, toes, and the sides of the feet.
The base of the palms matters too. If you stop too suddenly there, you can get that telltale orange band.
A simple science-backed routine for better results
If you want the shortest version of the routine, here it is:
- Exfoliate the day before.
- Moisturize dry spots right before tanning.
- Apply tanner to the body first.
- Use leftover product on elbows, knees, ankles, knuckles, hands and feet.
- Buff edges with a clean mitt or soft brush.
- Wash palms well and clean nails, cuticles and toe creases.
That is the core answer to how to stop fake tan clinging to elbows and ankles without making the rest of your tan look weak.
If your tan still goes patchy, check your skincare
Sometimes the problem is not the tanning product at all. It is what your skin has been going through all week.
Strong active skincare can change how evenly self-tanner fades and develops. If you use exfoliating acids, retinoids, or rough body treatments, you may notice clingy patches getting worse as the tan wears. If that sounds familiar, it is worth reading New ‘Retinol-Safe Tan’ Rule: How To Keep Your Self-Tanner Glowing While You Use Strong Actives, which explains why skin treatments can make self-tan behave differently.
How to fix danger zones after the tan develops
For too-dark elbows or ankles
Do not panic and scrub like crazy. Start with a warm shower, then gently massage the area with a washcloth, mild exfoliator, or a little body oil. Oil can help soften the top layer of skin so the excess color lifts more evenly.
For orange palms or knuckles
Use a gentle exfoliating pad, micellar water on a cotton pad, or a tan remover if you have one. Focus on softening, not sanding.
For patchy feet
Buff lightly, add moisturizer, and if needed apply a tiny amount of gradual tan to blend rather than doing a full dark reapplication.
Mistakes that make clinging worse
- Applying self-tanner to bone-dry elbows, knees and ankles
- Using the same amount of product everywhere
- Pumping mousse directly onto hands or feet
- Skipping exfoliation for several days
- Letting product pool in creases
- Forgetting to wash palms and clean around nails
Most self-tan disasters come down to one thing. Too much product on skin that was already primed to hold onto it.
At a Glance: Comparison
| Feature/Aspect | Details | Verdict |
|---|---|---|
| Prep for dry areas | Light moisturizer on elbows, knuckles, ankles, knees and palms before tanning creates a buffer. | Most important step for stopping dark patches. |
| Application method | Apply to large areas first, then use leftover product on danger zones and blend well. | Best way to keep color believable and even. |
| Fixing mistakes | Warm water, gentle exfoliation, body oil and careful blending can soften overly dark areas. | Useful for rescue, but prevention works better. |
Conclusion
The best part of the latest advice from dermatology coverage is that it takes the shame out of this problem. So-called fake tan danger zones are not proof that you messed up. They are just areas where skin is thicker, drier, and more likely to grab color. Once you know that, you can stop blaming yourself and start using a smarter routine. Exfoliate earlier, buffer dry spots, use less product there, and blend with a lighter hand. That gives you a more even, believable glow and makes it easier to stick with safer sunless tanning instead of feeling tempted to go back to UV tanning. A better tan is not about perfection. It is about knowing how your skin works and using that to your advantage.